Planning with Hobonichi Weeks & M5

Hello!

It has been more than half a year since I’ve updated anything on this blog. Life happened, like as usual whenever this blog is on hiatus. Nevertheless, the blog is back and alive! And life provided a few lessons on how to get it together, which is functional planning!

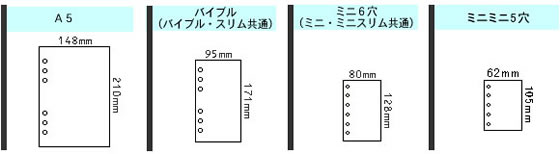
The most recent entry introduced the M5 or the micro 5 size (A7) system planner, refills and binder. If you happen to come across the Instagram account for phdcafé, you’ll be able to see in one of the vlogs how such a tiny and lovely system planner can be used. But wait there’s more! At some point in time, I somehow stopped using the M5 since we received Alexa as a present from a good friend. It suddenly became more convenient to just say your reminders and to-dos out loud to Alexa and have her record and notify you with everything. The only problem I have with it though is that, I move a lot around the house that I would sometimes miss the notification. Or, I’m not so sure what Alexa heard that the announcement sounded so messed up. So I stopped using Alexa for reminders and to-dos. Fortunately, this got me going again with the M5 that I’ve decided to level up on the cover!

Da Vinci’s micro5 Roroma Classic in green paired with Delfonics’ mini click wooden pen. Ruler for sizing reference.

Let me describe to you ways you could really gear up with this tiny thing as it packs a number of uses especially for those who are more into analog logging.

  1. Quickly note of schedules and important dates.

2. Take notes of anything and everything, from memos to shopping lists and to-dos!

3. Keep track of anything in a list or custom tracker layout.

4. Keep receipts, business card size or any small paper size items in a thin clear vinyl pocket.

5. Design with stickers and keep these in a clear pocket file envelope with detachable sides.

These are how I use the micro5 for functional planning. Now, how do I use it with the Hobonichi Weeks, you may ask.

Firstly, I usually note of schedules in both m5 and weeks. I try to synchronize these important dates wherever I wrote such first. Writing them twice makes me remember those dates better, even though there isn’t really much going on >.< Also, I somehow get creative with the schedule writing in the weekly layout using the icons in the stencil or stickers to design the free page. At times, I would also add stickers on the monthly schedule layout just to give it some artsy kick.

The weeks has the weekly outlook (of course) and the to-dos that I may have listed in the m5 gets written in the weekly layout. Transferring the to-dos enables me to decide which ones are a must-do and which are want-to-dos. These are also listed in the free page as a list first before transferring them again to specific schedules. Meal plans that I may have written on the go in the m5, typically gets transferred in the free page for that week. Or at times, I would list them directly on the weeks and the grocery list goes to the m5 sticky list for me to bring along.

All these may sound like its a lot to do but it really isn’t, if you get used to it I suppose. My mind is honestly a messy place and getting them on paper gets me to organize them better. This way has been easier for me as I’ve gotten used to the routing or practice if you may. I used to just have one memo pad or bullet journal for everything including work. However, I find that I get to have responsibilities more than work now and it is recommended to compartmentalize the planning, the mind and the planners as well. This reduces my stress and prevents me getting overwhelmed with the to-dos, both work and private life.

Let me know if this has helped you in a way or if you have any suggestions on how this could be improved. Probably in the next post, I’ll describe how I partition the weekly layout in the weeks for this purpose.

~ヾ(^∇^) Happy brewing!

-Louie

Micro5 system planner

In the world of system planners, which are mostly binder covers with custom loose leaf in them, there are several sizes that you could choose from with A5 being the biggest and typically the mini 6 the smallest. Then there’s a smaller size than the mini6 which is a mini 5. While mini 6 means having 6 holes in a binder, obviously mini 5 means only having 5. Even with just one less binder ring, it makes a significant difference with the paper size.

システム手帳(リフィール)のサイズ-A5/バイブル・ミニ・ミニミニ)
https://www.hot-c.com/contents/sizeerabi.html

If you are one who writes a lot or who writes in big characters, I wouldn’t suggest the mini5 size unless of course you’d simply want some fancy memo pad but not suitable for your needs if you’d use it as a planner. Rejoice for those with tiny hands and tiny handwriting, because the mini5 is just the most comfortable size! It may not be your main planner but something you’d like to bring along wherever you go, even if you’re just inside the house 😀

System clear binder for test case

I’m not really a fan of binder ring notebooks, to be honest, I abhorred it as a lefty student growing up until I was free to use whatever notebook I prefer. If I remember correctly, there was one point in time during grade school when we were required to use only spring notebooks and I’d always complain about my painful pinky. I don’t know why I was never introduced to system binder notebooks way back then (a long long time ago?). With system binder nowadays and with binder notebooks as well, it has become more convenient and comfortable to write on them because we could just simply remove the page where we want to write and put it back on the ring. Even better, we could just write on the loose leaf and put all those in the binder later. This is revolutionary for lefties in my opinion, even if the teacher requires the use of binder notebooks, we could write comfortably without hurting our pinkies, promise!

Another advantage of system binders is that, you could just invest on a really good binder that would last you for years and file the used pages in some place. This way, you somehow save on storage space and would always relish the years you have had with your binder for sure. And speaking of a good binder, I find that those usually come in leather products which are pricey. However, if you’re not really keen on this size just yet and only want to try as what I’m doing now, I would suggest a vinyl type mini5!

As for the refills, there’s the Filofax that probably most people outside of Japan are familiar of but there’s mountains of makers (indie and major ones) that produces refills for the mini5!!! As a neophyte, I simply checked the major ones for now since they probably sell refills in the reasonable price for the number of pages they offer. The ones I looked into were 1. Ashford, 2. Bindex, and 3. Raymay but there’s this newbie called Plotter were I got the monthly schedule refill which had the coolest font amongst the three aforementioned. I ordered blank pages in cream from 1 and 2, while getting the 5mm gridded one in 3 as it was the only one who offered in that grid size. 1 offers the 5mm dotted pages but I somehow preferred the one with lines. Unfortunately, however, the gridded paper didn’t fit in the clear system binder so I’m really hoping that it would fit on the real leather binder (if I ever decided to finally get one). Between the blank pages from 1 and 2, I preferred the thicker paper in 1 with the rose gold lining on it and I think 2 is more expensive overall in terms of leaf number for the price it offered. 1 is definitely the main player in the realm of micro5 and they have cheaper paper with an unbeatable quality as 2 and 3. Of course, you could also make your own refills with just a puncher and paper of your choice to even save more ka-chings. There are also paper specialty stores that offer refills for the m5, with reasonable price more or less for 30 pages you could get in a set.

Forget not the accessories that come with have a planner, you may need them to mark on some pages in your teeny weeny notebook especially if you have a lot. I would suggest to get an extra thick sticky film index from the dollar store as they do their job in par with the typical branded ones that people in social media use (they’re 2-3 times the price!). A simple paper clip would also do and as for me, I finally got to use the clover-shaped paper clip I purchased out of impulse from a sale lol. Then there’s this reinforcement labels for those pages you accidentally tear out from the binder. Also, I’ve had this stamp maker from a long long time ago and I just thought that now would be the best time to put it to good use again, which is why I got the blank pages. Fortunately, the biggest size of the stamp maker stencil fits perfectly well on the micro5 and I couldn’t be more happier! And for that, I created an Instagram account dedicated only to studying languages, check this out if you’re interested >> phdcafe_studygram

That’s it for my take on the micro 5 system planner, for now. I’m still experimenting with it. I wanted to measure the convenience and portability of the size and there are fewer chances to test it except when I move around the house ha-ha! What do you think of the micro 5? Would you be willing to try it? Leave a comment and let’s talk!

~ヾ(^∇^) Happy brewing!

-Louie